AIRMAIL on an apple Macintosh Computer running OS X using Crossover.
Installation Instruction Prelude.
Last Modified:
0.2 Release: Thu Dec 11 05:40:55 PST 2014
Added links to script, more info on Bluetooth.
0.1 Release: Wed Nov 19 07:42:06 PST 2014
What we wish to accomplish is install and have running a version of AIRMAIL on OS X using Crossover.
Normally on windows, AIRMAIL is installed on top of windows and communicates (using the appropriate driver) to the SCS modem. (stack on right below in diagram).

We are attempting to duplicate that on a Macintosh, but... do not have windows. Crossover is a program that makes a Macintosh pretend to be a windows PC, so that windows programs run as expected. Does that make sense? Crossover does this by mimicking the functions of windows. (The stack on the right).
Ingredients
Let us get all the parts together.....
- Crossover (a program that shall translate windows calls into appropriate OS X calls)
- AirMail (the appropriate version for SailMail and also for HAM operation as desired)
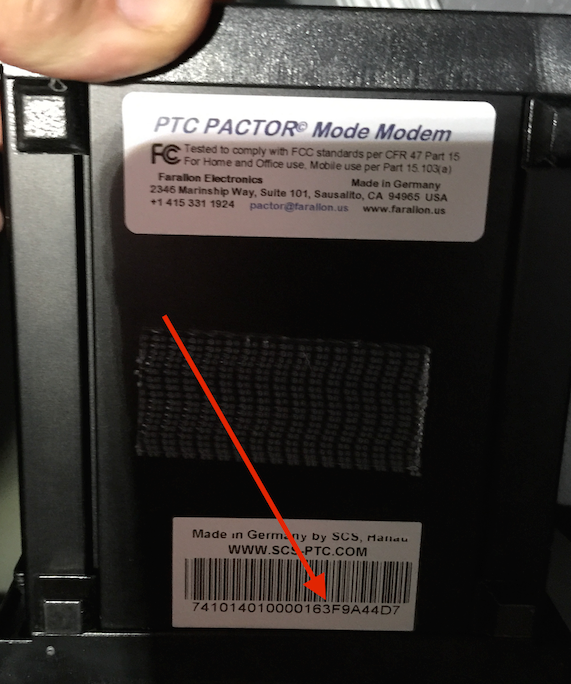
- Appropriate Drivers (for USB version, or if you are using an old Serial SCS modem, the driver for the USB to serial port cable you are using) If you are using bluetooth you do not need a driver. But you do need to know the last 8 characters of the SCS Modem's serial 'number'. The serial 'number' is NOT necessarily just Numeric digits like I thought initially. It could also be LETTERS. If you have bluetooth make a note of what the Serial 'Number' is, as the 'PIN' for Bluetooth connectivity is the last 8 CHARACTERS. (Taking a photo helps to see the little print for vision challenged people like myself). In this example the 'PIN' is 3F9A44D7 this is from a Dragon p7403
-
- 7800 PIN on OLED display (this image is from the dragon manual and the PIN is different then the one from the image above.):

-
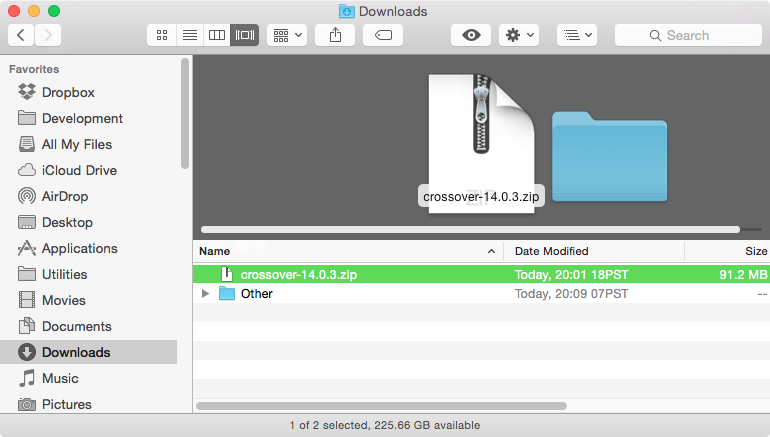
1) Download Crossover... a trial version can be used with all the features for 14 days is available here... It should download into your download location (typically Downloads folder) and you should find it there with a name such as crossover-14.0.3.zip.
A window like the following should appear:
Doubleclicking (or selecting the file and clicking on Open) should result in a new window with something like this:

It then creates an uncompressed application called Crossover. You may see something called Crossover.app or without the app for the name.

Installing Crossover consists of dragging it over to your Applications Folder...
2) Download Airmail
This should also end up in your download folder. We shall use this in a moment..
Your Download Folder should look similar to the following:
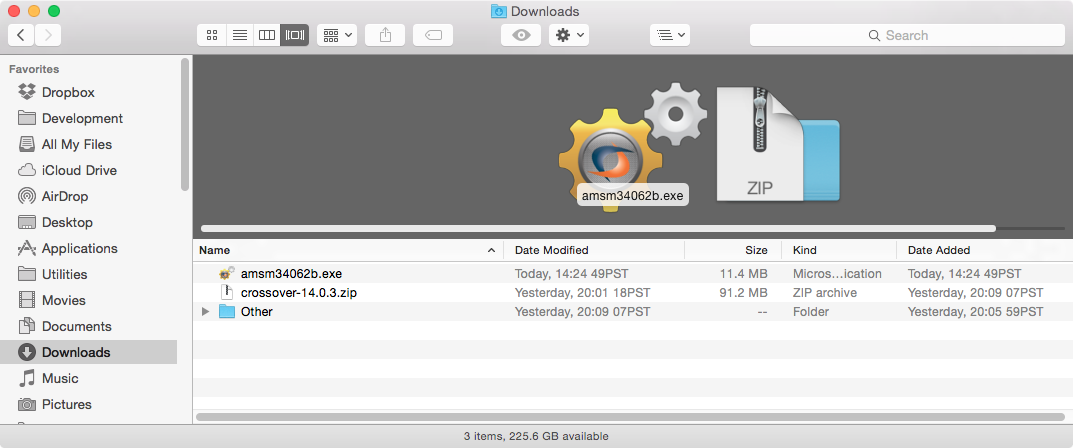
This is a download of the sail mail version of AirMail. For the ham version you would download the ham version. If you want to have both installed you may install them in separate 'containers' (or bottles as called by Crossover) or in the same bottle.
3) Download the appropriate OS X driver for your modem driver. (You jump to (3a) for the Bluetooth version)This is the portion that is slightly difficult, as one must know what the appropriate driver is. I have seen many usb - serial converters using the FTDI drivers. This also appears to be the chip used in the Pactor II USB modem.
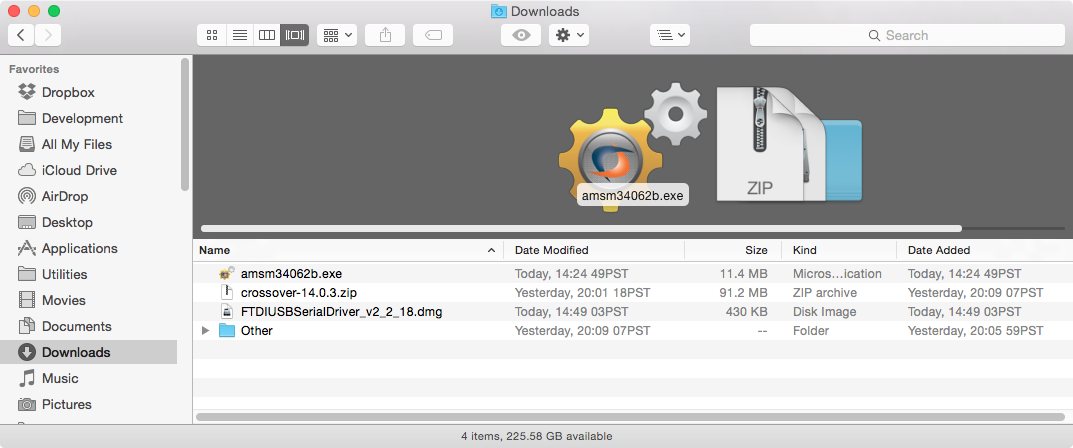
Choose the VCP driver utility from here: FTDI Virtual COM Port Drivers. , (as of Nov 2014 this is the link to the latest version: Version 2.2.18 x64 for Mac OS X. .
On older serial SCS modems that require a usb to serial cable such as:
you may be needing a driver from 'Pluggable' as opposed to FTDI. If can get a driver from here: (Direct Link) I have not checked a prolific driver solution. :(
On a Dragon it appears that a different FTDI driver is used. I have emailed FTDI (the makers of the usb/serial chip) for information as to the appropriate driver to use. When I get any information from FTDI about the drivers they suggest I shall post that here.
For Dragon systems it appears that D2XX1.2.2.dmg appears to be the correct driver. I have not confirmed this myself, as I have used the Bluetooth on Dragons for connectivity. I did email SCS-PTC and they said that the FTDI chip used was the FT232RL, with no indication of appropriate driver. Again, based on this information another driver to attempt to use would be the latest version: Version 2.2.18 x64 for Mac OS X. .
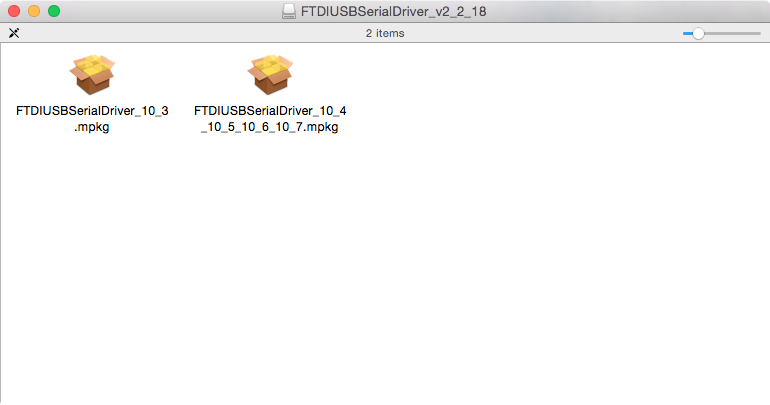
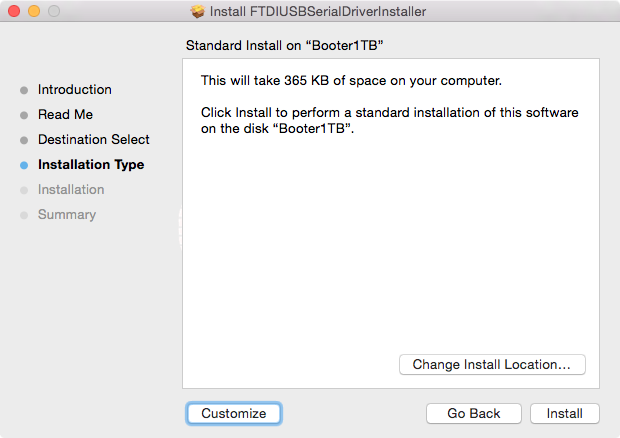
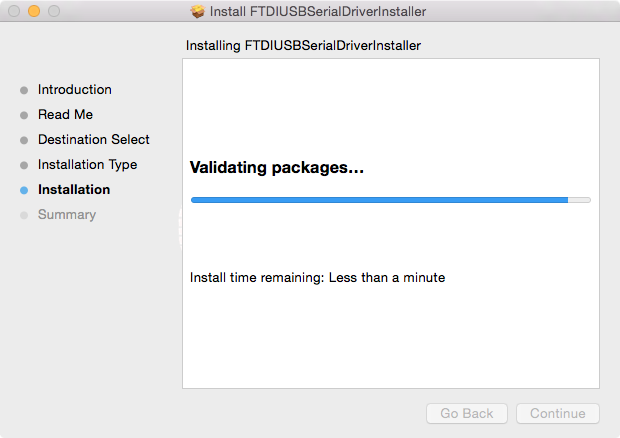
In the case of the FTDI Drivers, installation consists of opening the dmg file and then clicking on the package for 10.4 and above OS X systems.
In this case we select the installer on the right, as this is appropriate for our version of OS X.
If you happen be greeted by a frightening prompt stating that the package can not be opened, as the developer has not been identified:
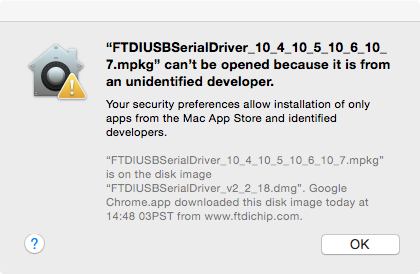
do not worry... We shall force the computer to install the driver software.
(The warning is because the developer has not registered with apple, and your computer has no way to trust that the program is correct and not laden with viruses... In this case, on Nov 18, 2014 CLAMXAV and AVG Virus Scanner both did not find any nasty surprises).
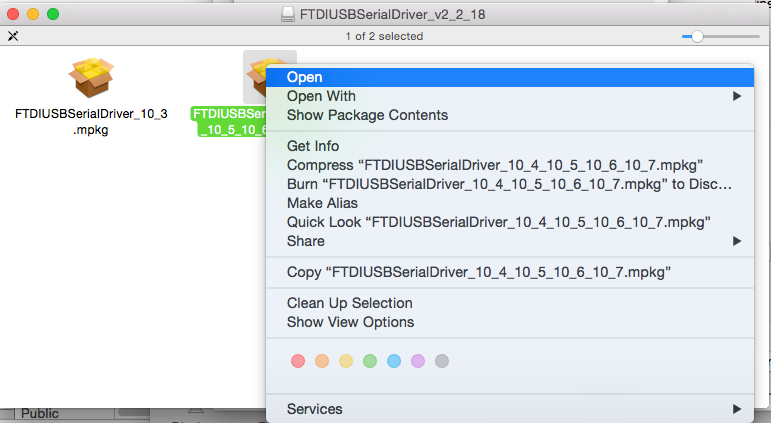
To override the security settings we shall do the following:
find the key labeled "control" on your keyboard. Now Click on the package (the one on the right in the FTDI case)
A menu should pop up with open being a choice. We select this.
We get a warning, and we continue:
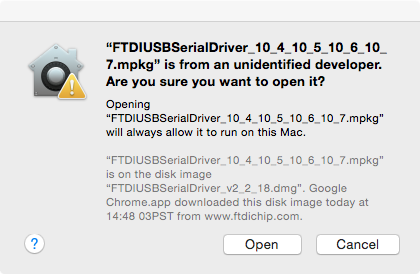
Then we get to our install dialog:
We are asked for our password:
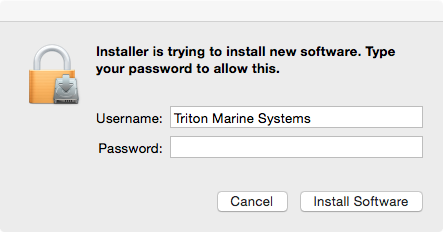
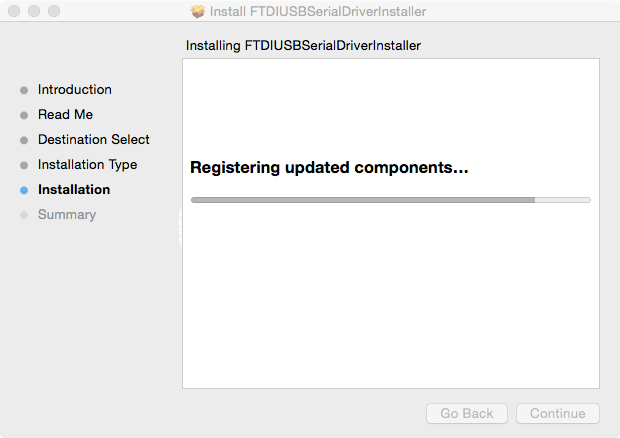
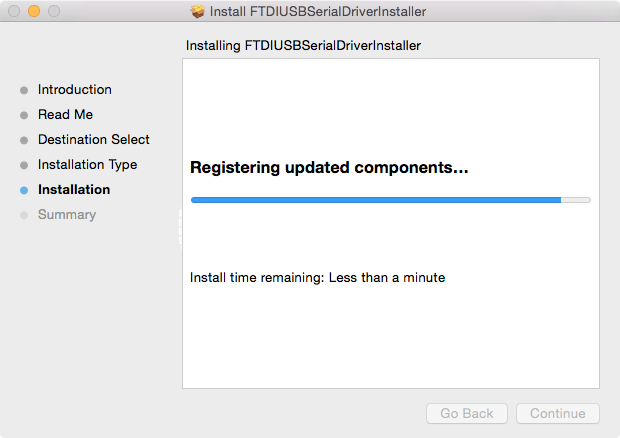
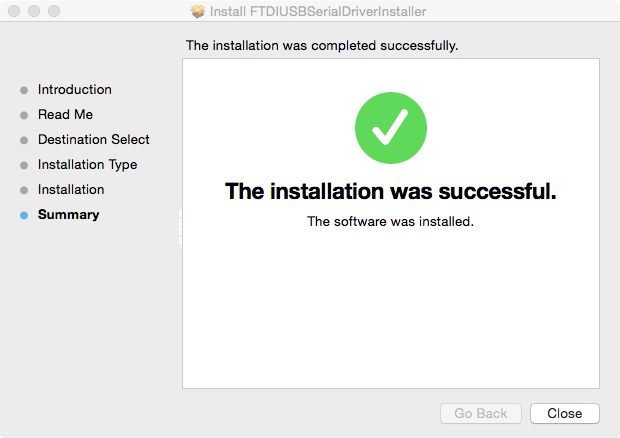
Entering the password correctly results in the start of the installation:
3a)Bluetooth Version
- We need to get the Mac talking with the Pactor. No additional drivers are needed here. Bluetooth will make it work for us. But Getting this paired is an exercise in patience. Open your system Preferences (underneath the apple), A Window should come up looking similar to this (without the red arrow):
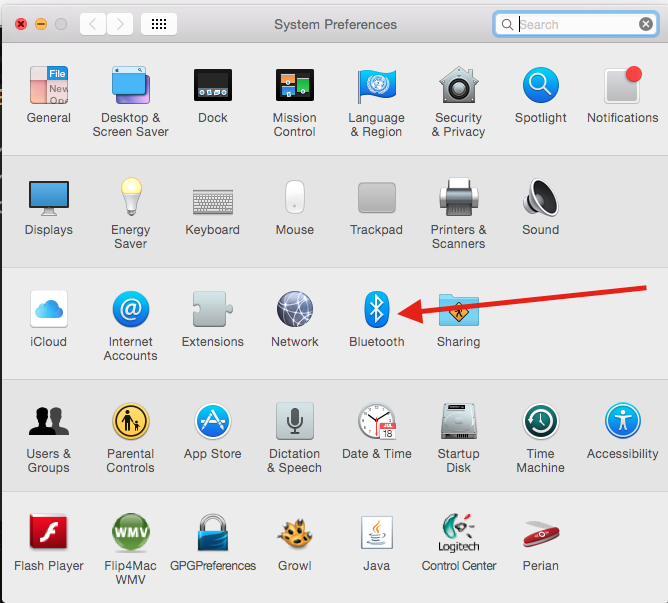
- Go over to the BlueTooth Item (the icon should be in the third row, and look like the icon that the red arrow is pointing to. The window should change, to look something like this (without the red lines):
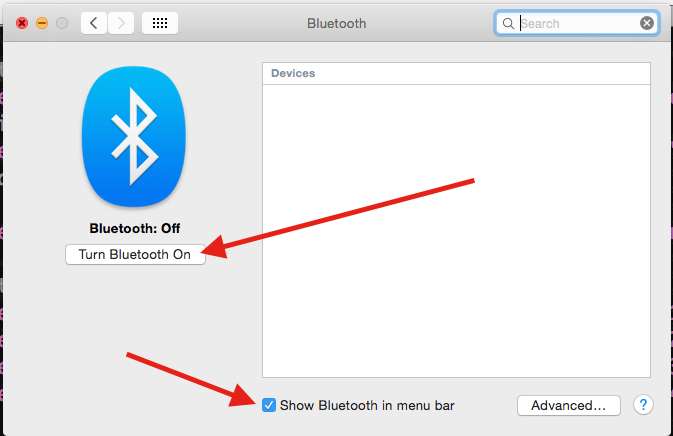
Insure that the box on the bottom is checked (pointed to by second red arrow from the top) By being checked we shall know the status of Bluetooth and Bluetooth connections. We shall want to turn bluetooth ON. (pointed to by first red arrow from top)
- In the menu bar, an icon that looks like the following shows us that Bluetooth is NOT turned on.

- In the menu bar, an icon that looks like the following shows us that Bluetooth is turned on.

- In the menu bar, an icon that looks like the following shows us that Bluetooth is turned on and connected to a device..

- Now we need to PAIR the Bluetooth in the Macintosh to our SCS Modem. To do so we insure that the Bloutooth is ON, AND our SCS modem is powered ON at this time. The modem should be showing up in the box on the right of the Bluetooth preferences:

We select 'Pair' and type in the last 8 characters from the serial number, remembering that number is actually character, and can include letters.
- After proper pairing, the status shall be 'connected' like so:
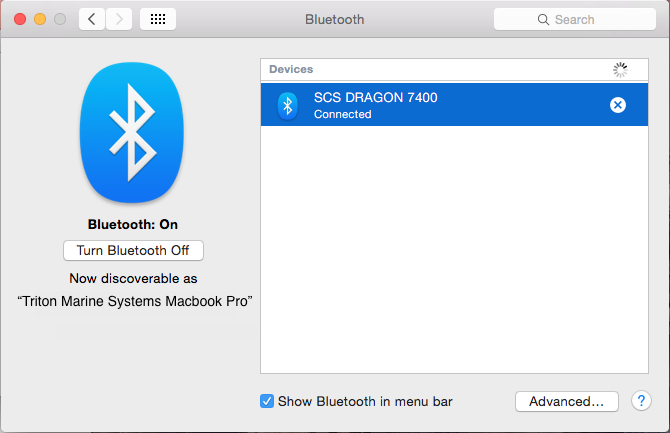
Do not worry, if AFTER proper pairing the status changes to 'Disconnected'. For me, this device showed up (a Dragon SC7400 with Bluetooth option) as 'tty.SCSDRAGON7400-SerialPort' in the /dev/ directory. I have emailed SCS to attempt to get a complete list of devices and drivers for the different modems. When I get a response I shall update this guide.
Now we need to verify that the Macintosh can see the USB/Serial port.
(for bluetooth we can skip over these instructions).

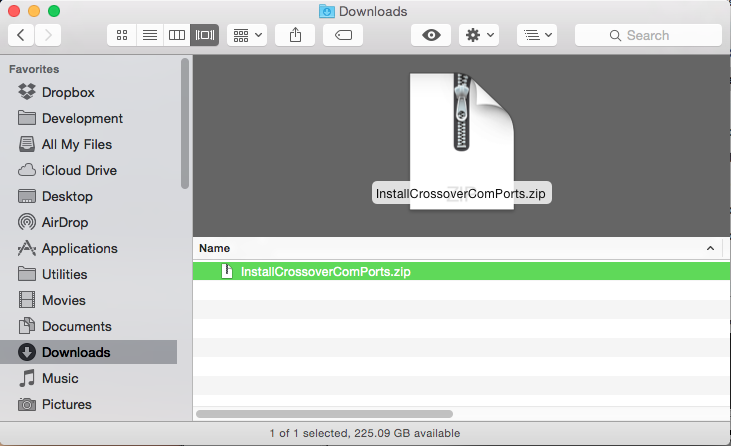
(Auto COM Installation Option) We've attempted to write a small bash program that will automatically insert the appropriate links in the appropriate 'CROSSOVER' bottles. Download the zipped bash script. It shall probably end up in your Downloads folder like so:
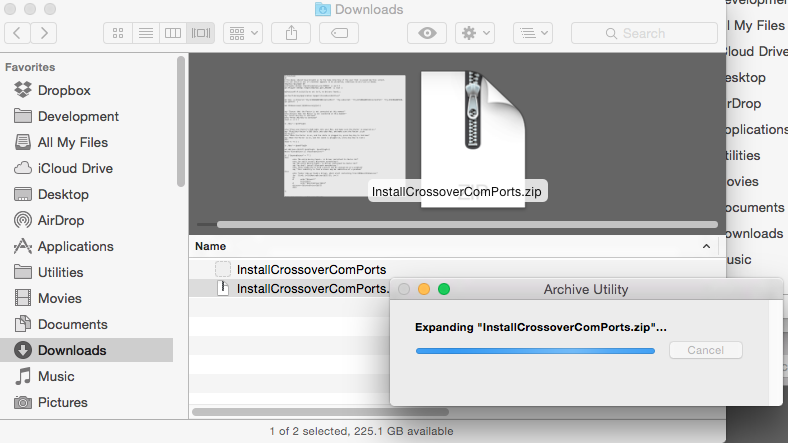
(Check it with a virus Checker) then uncompress the file (by double clicking on the downloaded file) (it will briefly open up a dialog explaining that it is unzipping the file like so:)
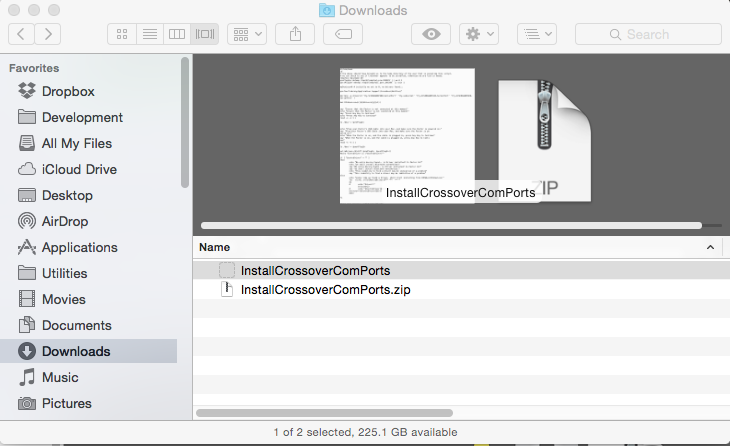
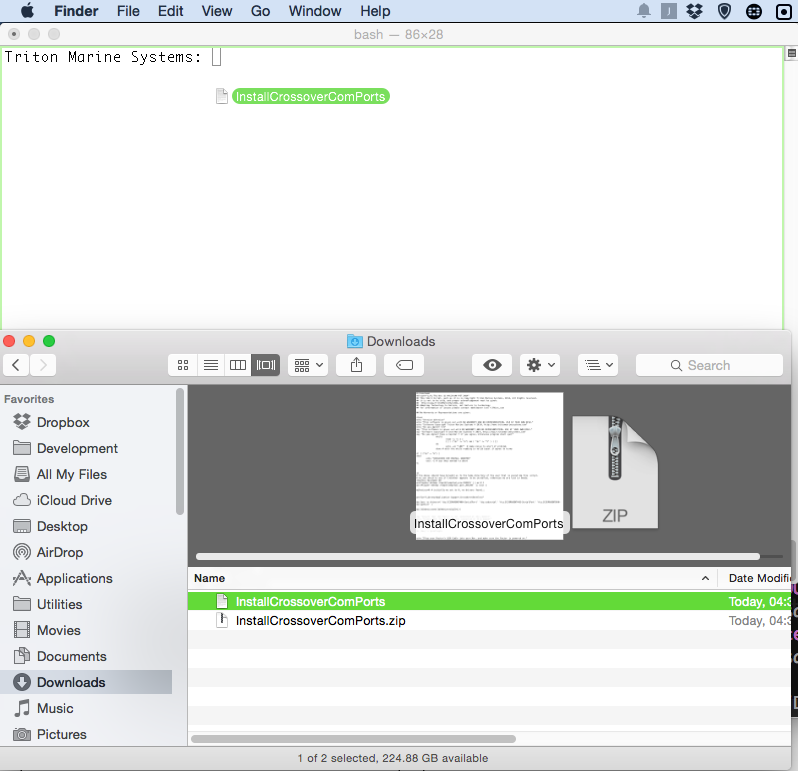
and the location the original file was downloaded should contain a new file called InstallCrossoverComPorts
Drag this new icon from the finder window onto a new terminal window, As illustrated in the following screen snap:
make sure you have your computer speaker volume working and press return. If you have no links created it will attempt to guide you into discovering the USB devices and linking to them in the appropriate bottles. It also attempts to hard code the Bluetooth connections that I have found for the P4Dragon 7400, and guesses as to 7800 et al.
If you wish to undo any com port assignments you have made, you can do so with a simple remove command that removes ALL com port assignments that have been made in ALL the Crossover Applications.
Just type (or better yet, copy and paste) the following into a new line in the terminal:
cd; rm Library/Application\ Support/CrossOver/Bottles/*/dosdevices/com*
The Older manual terminal installation instructions follow:
Open up terminal. (The easiest way is to go to the magnifying glass (spotlight) in the top left corner like so:

Doing so, shall open a window, where you can start typing, and Spotlight shall find the best matches. Typing Terminal results in something like the following:

open Terminal by clicking, tapping, or ....
It should open a Terminal window...
you can copy and paste the following line into the terminal (and type a return after you paste or type):
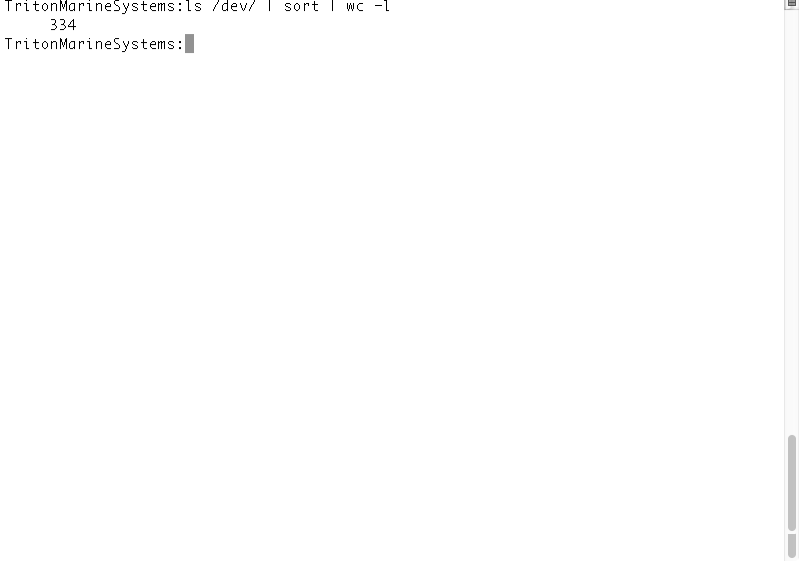
ls /dev/ | sort | wc -l
In the example below OS X found 334 devices.
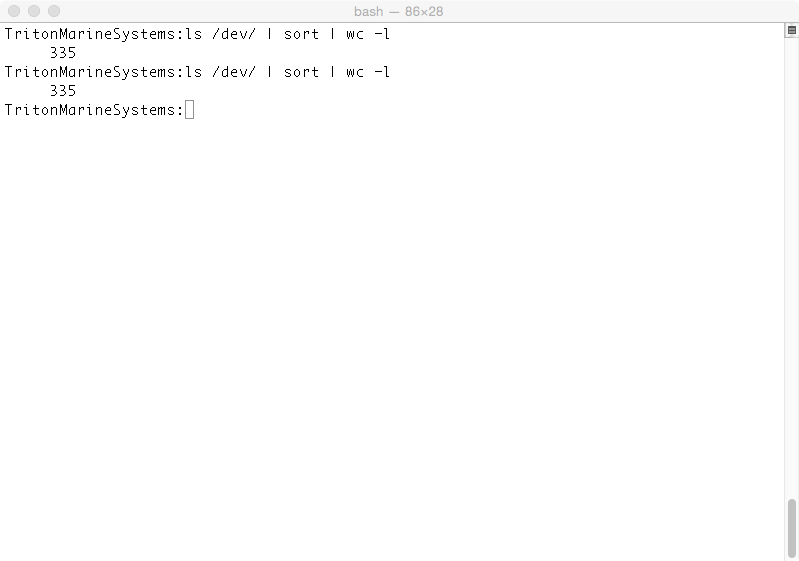
NOW let us plug in the usb to serial cable (for modem) or the USB cable that you use to connect to the modem.If you have multiple ways of connecting please only connect one at a time.
In the example below OS X now has found 335 devices. This is good, as we expect that by plugging in another device, OS X has recognized it. If the number does not change (and your modem was on) then there is a problem, and the correct OS X driver for your device is not installed.
Now we need to find the name of the device... but not to worry, we shall ask the computer to help us.
In (the same or new) terminal window we type the following:
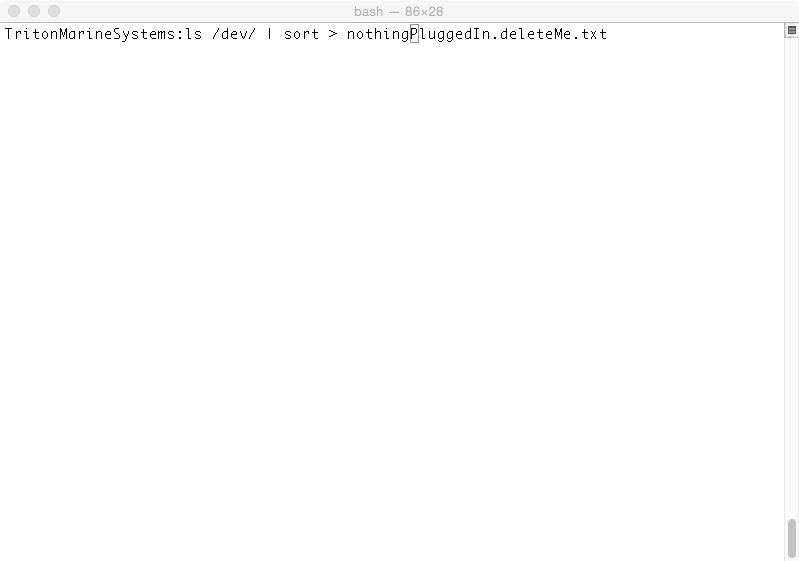
ls /dev/ | sort > PluggedIn.deleteMe.txt
I suggest that you copy and paste the command from the line above.
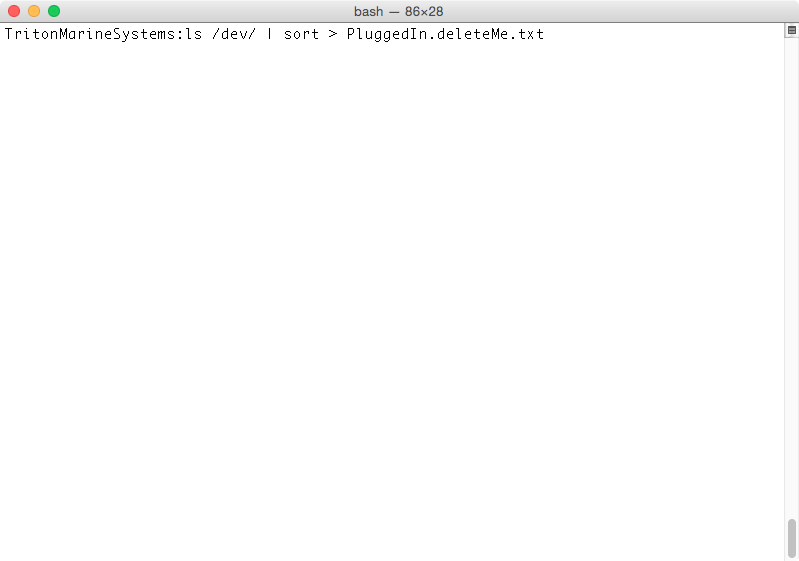
this creates a file with all the devices found, sorted alphabetically.
Now we need to unplug the modem/serial/usb cable.
and type the following into the terminal window:
ls /dev/ | sort > nothingPluggedIn.deleteMe.txt
Now we need to see what the difference is between the two files.
so now we type the following in the terminal:
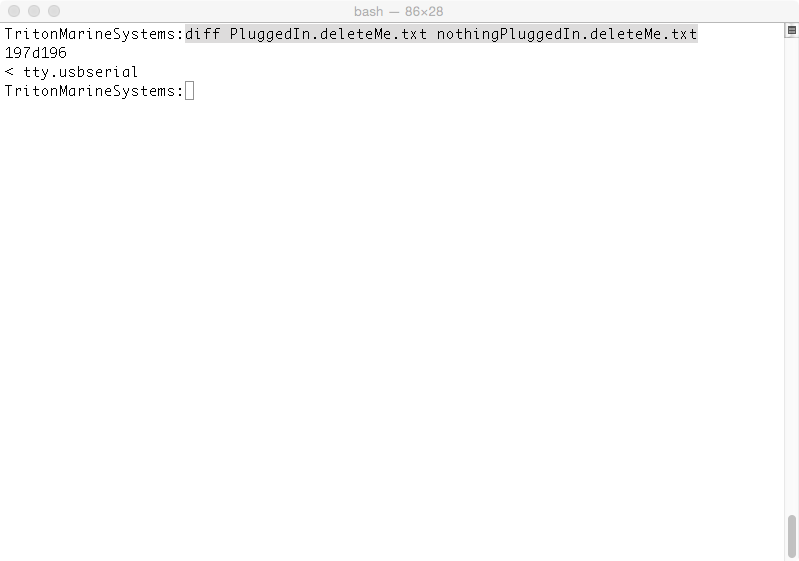
diff PluggedIn.deleteMe.txt nothingPluggedIn.deleteMe.txt
resulting in a difference found at a certain place... and the name of the device we are looking for is:
tty.usbserial
Note that your results may be different. You may have more then one device. It may be spelt differently. Copy and Paste shall be your friend..
as we can see from the following terminal window.
Do not worry if more then one item shows up. We shall connect any extra devices to different com ports.
now we need to install airmail. The simplest way is to simply double click the .exe that is the airmail setup.
Crossover shall ask to confirm if this is a supported app. It is of course NOT SUPPORTED...
But not to worry. Install, with all the defaults. When you are done we go to our terminal friend and let AirMail know that a com port exists.
We assume that Airmail has been installed in the default location.
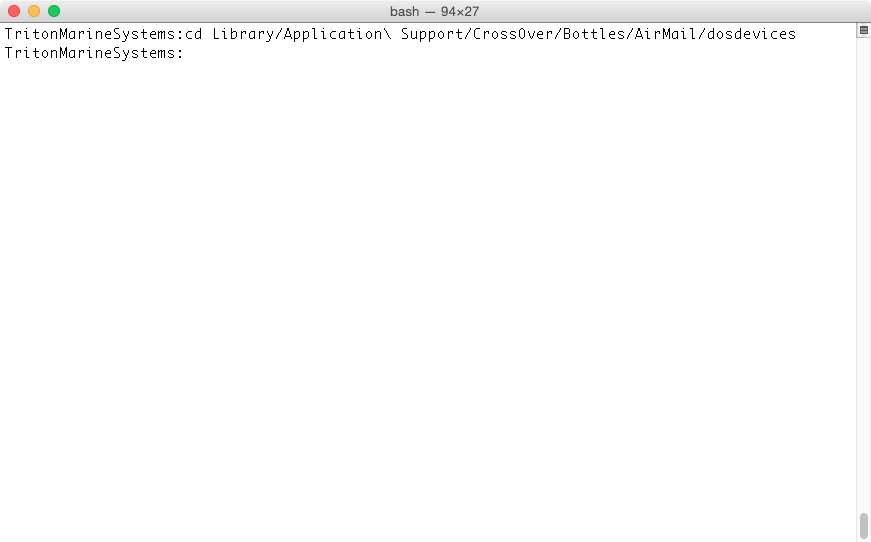
In terminal we use the following command:
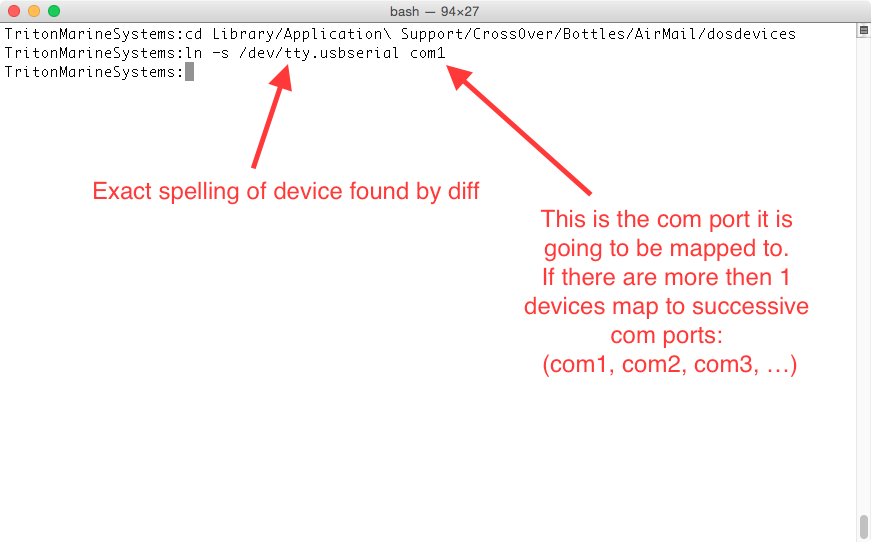
cd Library/Application\ Support/CrossOver/Bottles/AirMail/dosdevices
Then we use the following command so Airmail and Crossover know where to find the connection to our modem:
ln -s /dev/tty.usbserial com1
where the italics are meant to represent the device (or devices) found after driver installation.
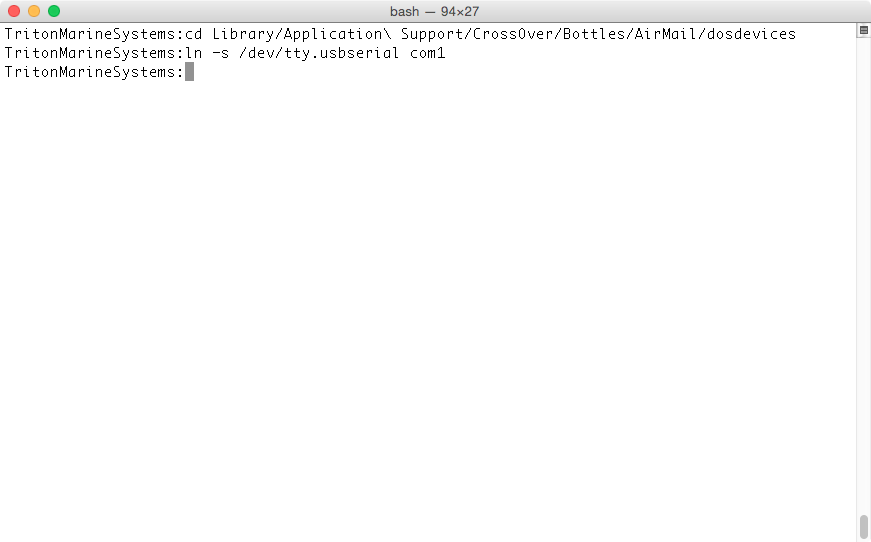
The following screen grab has red arrows attempting to explain the portions that MAY be different on your computer.
Now make sure your modem is up and running and plugged into your mac. And start your Airmail.
you start it by clicking in the AirMail icon (there will be two, but you want the installed application, not the installer again....)
Note that in the screen grab below, the two icons are identical, but the label in hard to read writing UNDER the icon is different. We choose the label 'AirMail', not some .exe file that was used to install your version of airmail...

Fixing an update bug in AirMail... seeing messages as you compose them
In your running copy of AirMail...
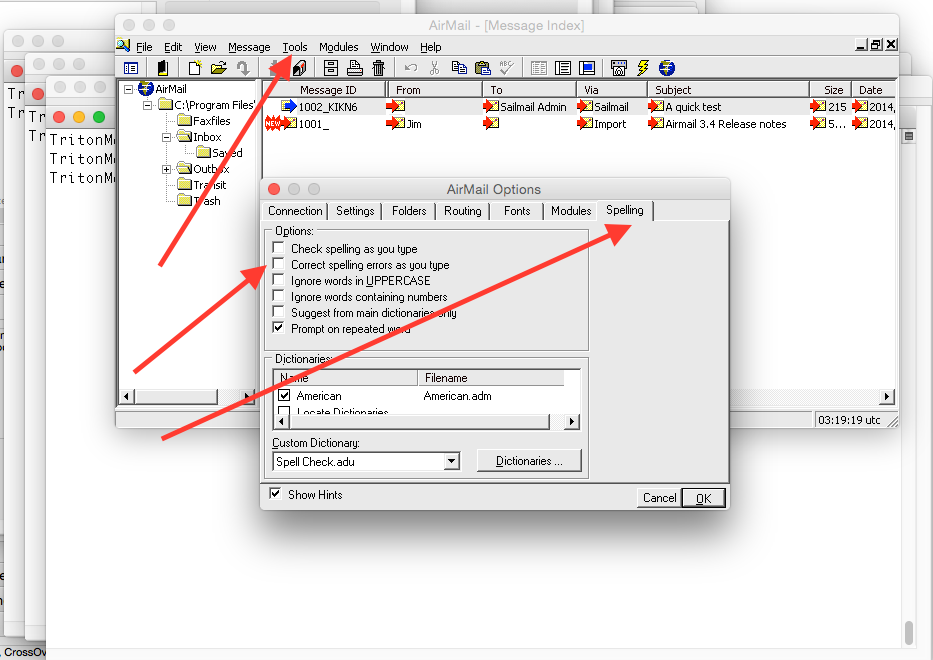
- Go to tools in the 5'th menu on the right of the airmail window.
- Click on the menu and select the first item: 'Options'......
- Select the 'Spelling Tab on the far right'
- Make sure you do not have the 'check spelling as you type' and 'correct spelling as you type' options selected.
- Click OK (button on bottom right)
- And... Done...
This is intended as a quick guide to installation of AIRMAIL on a Macintosh.
Whilst the instructions may also work for older or future versions of OS X, they have been verified working for OS X 10.9 and 10.10 and Crossover Version 13.2 (13.2.0.27771) and Version 14.0.3 (14.0.3.28476). This information is given for free, and comes with a money back guarantee. No responsibility is taken for any issues or problems..... Best of luck...
TroubleShooting
What guide would be complete without a TroubleShooting section. If things are NOT working at the end of these instructions, you may feel like shooting the computer, shooting the guide maker, shooting ... well you get the picture. Go away and grab a cup of tea. Relax. What is the difference in this guide and your computer? I shall be adding in some common issues, and how to solve them.
Updating issues....
Insure you have definitely turned off spellchecking as described above.
- More then 1 Device found after driver installation: Add in successive devices as different com ports. (Example shall follow after I get time to make new pictures) This is accomplished by replacing the command in the terminal "ln -s /dev/tty.usbserial With the names of the devices found in the find devices step
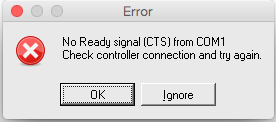
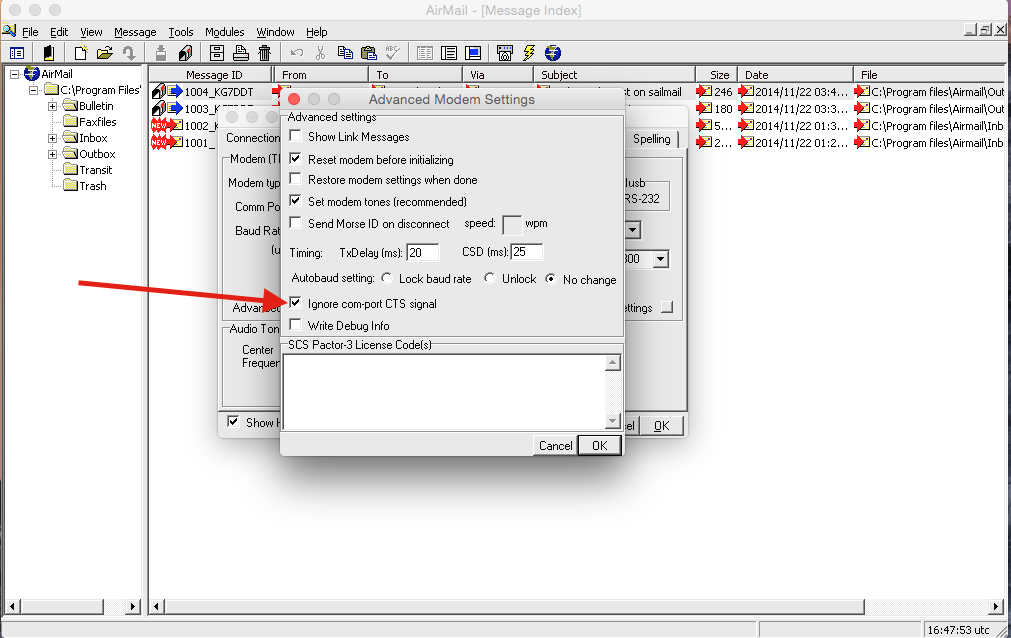
- During Communication Attempt An error shows up with "No Ready signal (CTS) from COM1. Check controller connection and try again."
A dialog shows up like so:
To fix this we need to go to the settings option again(Go to tools in the 5'th menu on the right of the airmail window.Click on the menu and select the first item: 'Options'......), and select Advanced Modem Settings. (Pointed to by the red arrow in the following screen snap:
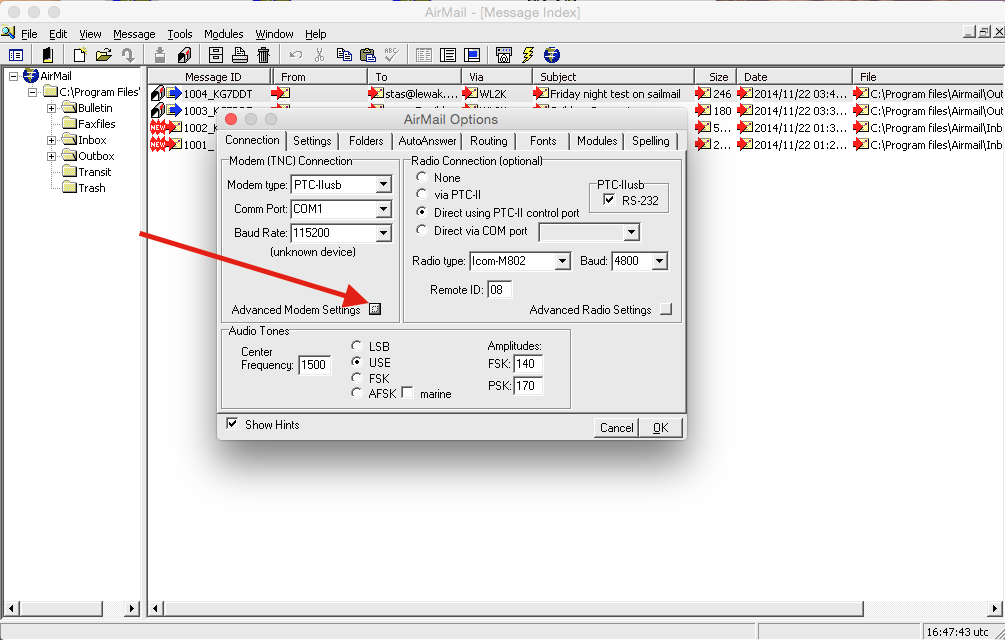
This should open up a new dialog looking like the following (insure the checkbox for ignore CTS settings is checked, pointed to by the red arrow):
GLOSSARY:
Crossover is a program written and sold by CodeWeavers that intercepts calls from programs written for a Windows (PC) platform and translates them to result in the same functionality on a OS X platform. It does not change them to look like macintosh programs, rather it makes it look like a windows program is running on your macintosh.
AIRMAIL is a program written and supported by Jim Corenman and can be downloaded from here. Airmail normally runs on a Windows (PC) platform to communicate to your SCS modem via a USB/ SERIAL/ BLUETOOTH connection. (Direct link to download: here )
SCS MODEM: is a hardware thin box that connects to your SSB to transmit and receive digital information via the SSB.
SSB (Single Side Band) is a radio that receives and transmits information over large (many hundreds or thousands) of nautical miles.